Tally Payroll is integrated with Accounting to give the user the benefits of simplified Payroll processing and accounting.
Tally Payroll enables users to set up and implement salary structures, ranging from simple to complex, as per the organization’s requirements. Yes can also align and automate payroll processes and directly integrate them with main stream accounting applications. Payroll data can be viewed as part of the existing and configurable cost centre reports for business analysis.
Tally Payroll also supports configurable formats for payslip printing; flexible salary/wage, attendance, leave and overtime registers; gratuity and Expat reports.
FEATURES OF TALLY PAYROLL
In keeping also supports configurable formats for payslip printing; salary/wage. Attendance, leave and overtime registers; gratuity and expat requirements of small to large business enterprises.
- It allows seamless integration with Tally Accounts. There are no disconnects between Payroll and Accounts.
- It offers Employee Groups – unlimited classification and sub-classification of employees.
- I offer Pay Structures-ease of conformity, faster entry and flexibility of non-dependence.
- It offers Pay Components- user –definable earnings, deductions and others.
- It offers a unique Auto-Manual payroll processing Facility.
- It is independent of processing period restrictions.
- It offers Employee Groups, Pay structures and Pay components.
- It offers a unique Auto-Manual payroll processing facility.
- It allows Arrears Calculation.
- It computes salary based on Attendance, Time, and Unit of Production.
- Tally Payroll helps in tracking of Loans and Advances.
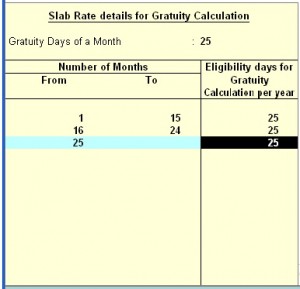
- It provides calculation of Gratuity.
- It allows you to drill down from any summary report to detailed levels, and till the origination transaction, for a particular Pay component value.
- It provides configurable report formats.
- You can also process Payroll using the Multilingual feature in Tally.
Enabling Payroll in Tally
To enable Payroll in Tally
Go to Gateway of Tally>F11: Features>Accounting Features.
- Set Maintain Payroll to Yes
- You can set More than ONE Payroll/ Cost Category to Yes if you wish to process payroll for multi group of Employees.
FOUR EASY STEPS TO GENERATEA PAYSLIP
The new enhanced Payroll in Tally requires minimal effort for accurate processing. Setting up Pay Heads, Employee Group, Employees, Salary Details and attendance/Production Type is now a simple process with Tally’s Four easy steps to generate a payslip.
Step 1
Create Pay Heads
The components of structured salary are created under Pay Head
Create the salary structure components in Pay head. The Pay head creation in tally is very user friendly. Tally allows creating any complex type of pay head.
Step 2
Create Employee Masters
Create an Employee master. Enter the requisite Employee Details & Employee group by grouping employees under the function they perform; their department or designation.
Step 3
Create Salary Details
Create the applicable Salary Details for both Employee Groups as well as Individual Employees with earnings, deductions and basis of computation.
Step 4
Process Payroll and Generate the Payslip
Pass a Payroll voucher to enter all Earnings and Deductions in Payroll transactions that are paid along with the salary Payslip for all employees
Generate the Payslip that provides employee as well as attendance details, itemizes each component of the employee’s earnings and deductions, and displays the net amount paid to him for a given pay period. It also provides information to the employees to how the net amount was arrived at.
PAYROLL CONFIGURATION
The Payroll Configuration can be enabled as shown below:
Gateway of Tally> F12: Configure> Payroll Configuration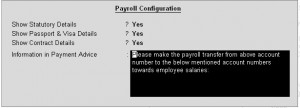
In the above screen;
- The option Show NI Number (for International companies only) and Show Statutory Details (for India/SAARC Companies only) can be set to Yes to enter the NI details/PF, ESI and PF PAN details in the Employee details form and print the same information in the Employee Payslip.
- The options, Show Passport & Visa Details and Show Contract Details, should be set to Yes as shown, to display the Passport, Visa and Contact Details in the Expat Reports. If these options are set to No, then the Expat Reports menu will not be displayed under Payroll Reports. Some of the Information related to Employee passport such as Passport Number, Passport Expiry date, Visa Number, Visa Expiry date, contract Start and Expiry dates will not be displayed at the creation of the Employee.
PAYROLL INFO.
The Payroll Info. allows you to set up the employee defaults and standard payroll information with common payroll fields used for calculating earning and deductions.
Go to Gateway of Tally > Payroll Info.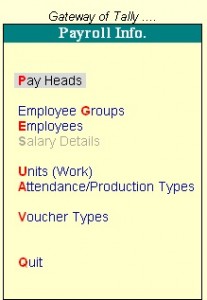
PAY HEADS
The salary components constituting Pay Structures are called Pay Heads. A Pay Head may be an earning, which is paid to an employee, or a deduction, which is recovered from his/her salary. The value of these Pay Heads could be either fixed or variable, for each Payroll period.
Pay Head Type
A Pay Head is categorized as Allowances, Deductions or Reimbursements
In Tally Payroll, Pay Head types are provided in a natural language for ease of use, as follows:
- Earning for Employees
- Deduction from Employees
- Employer’s Statutory deductions
- Employer’s Statutory Contribution
- Gratuity
- Loans and Advances
- Reimbursement to Employees
While creating the salary payable ledger you can use Not Applicable type which will be used to post appropriate accounting entries.
CALCULATION TYPES
The Calculation of the Pay Head is bases on its Calculation Type.
Tally payroll allows following calculation methods
Note: The formula defined in Calculation Type will be used for computation only while using Payroll Auto Fill functionality in the Payroll Voucher, and not in Manual entry mode of Payroll voucher.
The following computational models are supported in Calculation Types.
As Flat Rate
As Flat Rate is a Calculation where the value of the Payroll head is a fixed amount for a period. Pro-rated. In Tally the attendance can be of Payable days (Present) or loss of pay (Absent) type.
On Production
On production calculation type is used to calculate the Production incentive type of Pay head. The production date can be entered in Attendance voucher against a Production type.
As Computed Value
As Computed Value is used if the Pay Head value is based on a dependent component. You will be able to define the dependent component by specifying the formula or using the current sub- total or current earning or deduction total. You can also define the slab either by percentage to value or the combination in a slab.
Example:
HRA as 40% of Basic Salary
As User defined Value
As User defined Value allows you to manually enter the value at the time of processing the salary. This calculation type is useful for Pay Heads that have variable values and are not related to any attendance/production data.
CREATING AN EARNING PAY HEAD
To create an Earning Pay Head, Basic Salary, under Indirect Expenses:
Go to Gateway of Tally > Payroll Info. > Pay Heads > Create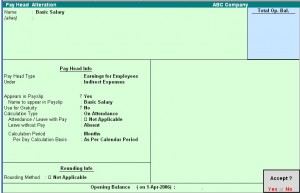
- Enter the Name of the Earning Pay Head.
- Select Earning for Employees as the Pay Head Type form the List of Pay Head Types.
- Select the respective Pay Head Group Earnings from the list for the field Under.
- select Yes from the list if you want the Pay head to affect the net salary.
- The Pay Head name entered in the Name field will appear in this field. You can change the same, if required. The name entered in this field will appear on the payslip.
- Select Flat Rate from the List of Calculation Types.
- Select the Calculation Period Type from the list.
- Based on the Calculation Period Type, you can select and enter the details for Per Day Calculation Basis.
- Select the Rounding Method from the list if applicable.
10. Accept to save the Pay Head.
Similarly, you can crate Earning Pay Heads for HRA, Conveyance and so on…
CREATING A DEDUCTION PAY HEAD
To create a Deduction Pay Head, Professional Tax under Employees’ Statutory Deductions:
Go to Gateway of Tally > Pay roll Info. > Pay Head > create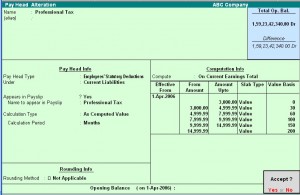
- Enter the Name of the Deduction Pay Head.
- Select the Pay Head Type from the List of Pay Head Types.
- Select the Group from the List of Groups.
- select Yes from the list if you want the Pay Head to affect the net salary.
- The Pay Head name entered in the Name field will appear in this field. You can change the same, if required. The name entered in this field will appear on the payslip.
- Select the Calculation Type from the List of Calculation.
- On selecting the Calculation type to ‘As Computed Value, a new field Calculation Period appears which will be set to Months automatically.
- Select On Current Earnings Total from the list to be Computed On.
- Specify the Slab Rate.
10. Select the Rounding Method from the list if applicable.
11. Accept to save the Pay Head.
Similarly, you can create a Deduction Pay Head for Provident Fund and so on
Note: If you are using any Pay Head component having Calculation Type As Computed Value and Compute: On Current Earning Total, while defining Salary Detail, the sequence of the component has to be selected accordingly.
Creating Salary Payable Ledger
A Salary Payable account under the group Current Liabilities is used to credit the total of Net Payable salary of all employees. When salary is disbursed, this account is debited and Cash or Bank account is credited.
To Create Salary Payable Pay Head under the group Indirect Expenses:
Go to Gateway of Tally > Payroll info. > Pay Heads > Create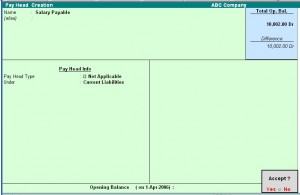
- Enter the Name of the Pay Head
- Select Note Applicable from the List of Pay Head Types
- Select Current Liabilities from the list
- Accept to save the Pay Head
CREATING GRATUITY PAY HEAD
To create a Pay Head Gratuity under Current Liabilities:
Go to Gateway of Tally > Payroll Info. > Pay Head > Create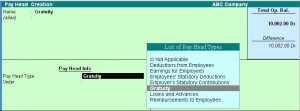
- Enter the Name of the Pay Head
- Select Gratuity from the List of Pay Head Types
- Select Current Liabilities from the list
- Accept to save the Pay Head
Note: To use the Earning Pay Head for Gratuity calculation, set Use for Gratuity? Field to Yes in the ledger creation screen (for Pay Heads such as Basic Salary, HRA, and so on, created under Indirect Expenses).
EMPLOYEE GROUP
Tally allows you to set up default (common) information for employees. An Employee Group allows you to group employees in a logical manner.
The Salary structure can be defined at the Employee Group level. Referring to this Group as a template and changing accordingly will ease building all your employee records on it.
For example, by department or function such as Production, Salas, Administration and so on, or by designation such as Managers, supervisors, Workers and so on.
CREATING AN EMPLOYEES GROUP
To create Sales as an Employee Group,
Go to Gateway of Tally> Payroll Info.> Employee Groups> Create (Single Group)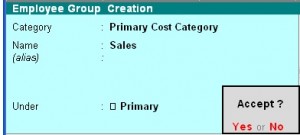
- Enter the Name of the Employee group.
- Select the group from the List of Employee Groups.
- Accept to save the Employee Group.
Creating Multiple Employee Groups
You can create multiple Employee Groups in this mode.
Go to Gateway of Tally> Payroll Info.> Employees> Create (under Multiple Groups)
The Multi Employee Group Creation screen displays.![]()
EMPLOYEE
The Employee Creation screen allows you to enter basic setup information that applies to the employees. Enter General Information, Payment Details and Passport & Visa Details.
CREATING AN EMPLOYEE
Creating single Employee
To create an Employee under the Employee group, Sales:
Go to Gateway of Tally> Payroll Info.> Employees> Create (Single Employees)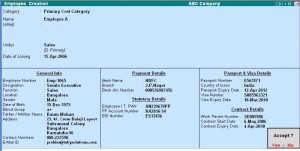
“Enter the Name of the Employee; Select the Employee Group in the field Under, Enter the Date of Joining, the Employee General Information, Payment Details, Passport & Visa Details and Accept to save.
CREATING MULTIPLE EMPLOYEES
You can create multiple Employees in this mode.
Go to Gateway of Tally> Payroll Info.> Employees> Create (under Multiple Employee)![]()
Salary Details
Salary Details is used to define a Pay Structure to an Employee or to an Employee Group to speed up the entry of Individual Employee’s Pay Structure.
Select the basic Pay Heads that applies most for your employees and create as an Employee Group. However, it is not compulsory for all employees to have the same compensation structures as of the Employee Group. If required, a Pay Head element or its value may be added, deleted or altered at Individual Employee level.
Note: If the slab rate is not defined in the Pay Head then you will get the full value
CREATING SALARY DETAILS FOR AN EMPLOYEE
To create Salary Details for an Employee:
Go to Gateway of Tally> Payroll Info.> Salary Details> create> Select the Employee from the List of Employees/Group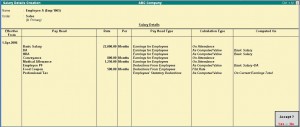
- Enter the Effective From date.
- In the Pay Head field, the Start Type list displays two option namely, copy From Parent Value and Start Afresh.
- If you select Copy From Parent Value, the Salary Details defined for the Employee Group to which the Employee belongs will appear in the screen.
Note: If the Pay-Head details are available in the parent group then you will get Copy from parent value, else you will get only Start Afresh.
- If you select Start Afresh, you have to select the Pay Heads from the List of Pay Heads and enter the User Defined rates if required.
UNITS (WORK)
A Unit in Tally Payroll is similar to the Unit of Measure in Tally’s Inventory module. In Payroll, Units are used to facilitate calculation of a Pay Head value based on Production, which in turn would be linked to Units such as Time, Work or Quantity.
Go to Gateway of Tally > Payroll Info. > Unit (Work)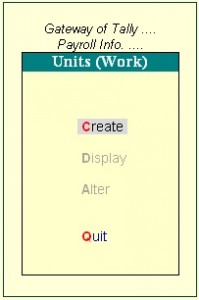
Creating Units (Work)
In the Units Creating screen, select the Type of unit from the list. Select the Symbol from the list.
A Simple Unit in Tally is a Single independent unit and has no relationship with other units, while a Compound Unit refers to two Simple Units having an arithmetical relationship and is not a distinct unite.
In the case of Overtime, whose value is computed based on Overtime Hours put in by an employee, you would need to define Hr- Hours and Min- minutes as Simple Units and Hr of 60 Min as a Compound Unit and set this unit in Overtime Pay Head.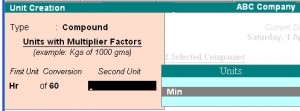
ATTENDANCE/PRODUCTION TYPE
The Attendance / Production type is used to record the attendance and production data. Bases on the component (Pay head) structure, you can define multiple attendance / production types.
Examples for attendance / production types are No. of days present or conversely, No. of days Absent and production based such as Hours worked, Number of Pieces produced.
Attendance/Production Type is associated with the Pay Head in employee’s Pay structure. The variable data is entered in the Attendance voucher for the payroll period.
Attendance/Production Type may also be defined in hierarchical groups whereby Types having a common Unit are combined under logical groups.
The Attendance/Production Type may be Attendance/leave with pay, Leave without Pay (if salary is to be paid based on number of days attended) Paid Leave, Unpaid Leave, Absent and Production type which can be based on Piece Production, Overtime House, and so on.
CREATING AN ATTENDANCE/PRODUCTION TYPE
Creating an Attendance/Production Type for Attendance/Leave with Pay
Go to Gateway of Tally > Payroll Info. > Attendance/Production Types > Create
- Enter the Name of the Attendance Type
- Select Primary from the list for the field Under.
- Select Attendance/Leave with Pay as the Attendance Type.
- The Period Type appears automatically.
- Accept to save the Attendance Type.
Similarly, you can create an unpaid Leave grouped under Leave without Pay.
CREATING AN ATTENDANCE/PRODUCTION TYPE FOR PRODUCTION
Go to Gateway of Tally > Payroll Info. > Attendance/Production Types > Create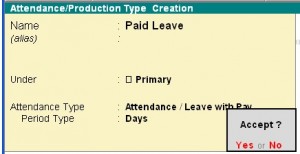
- Enter the Name of the Attendance Type
- Select Primary from the list for the field Under.
- Select Production as the Attendance Type.
- The Unit field will appear, select the appropriate type of unit from the list.
- Accept to save the Attendance Type.
Similarly, you can create Box Production Attendance Type
VOUCHER TYPES IN TALLY PAYROLL
Tally Payroll provides you with Payroll, Attendance and Payment Voucher Types. You may define a template called Voucher Class in order to automate and control usage of ledger accounts and computed values to be posted. It is a powerful and configurable option that enables you be define the rules of voucher entry for a particular voucher type. It also helps in speeding up the process and minimizes data entry for posting a voucher. However, creating a Voucher Class is not mandatory.
PAYROLL VOUCHERS
In addition to the existing voucher types in Accounting and Inventory module, two new Voucher Types Attendance and Payroll are enabled when Payroll Feature is activated in F11: Features.
Go to Gateway of Tally> Payroll vouchers
Attendance voucher is used to record employees’ Attendance / Production data for the Attendance / Production Types creates in Payroll Masters. Such data may be entered as a single Attendance voucher per payroll period or multiple vouchers as and when required within a payroll period.
While generating the Payroll voucher, Tally automatically picks up required data, based on the period selected and computes the corresponding value of Pay Heads, which are linked to such Attendance / Production types.
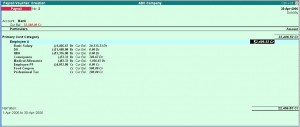
Payroll voucher is a document to manually enter one-time/ad-hoc payroll transactions for individual employees; as well as Payroll processing activity for all or selected employees, using Auto Fill functionality.
Payroll Buttons
If Maintain Payroll option is set to Yes in F11; Features, the payroll Buttons will appear along with Accounts and Inventory buttons in Voucher Creation screen on the button bar.
ATTENDANCE VOUCHERS
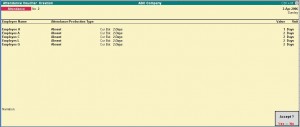
Attendance voucher allows you to enter Attendance, Overtime, Leave or Production details. You can enter separate vouchers for each day or a single voucher for a given pay period, say a month, with aggregated Values. You can also enter data for one or more or all employees.
Similarly, one or more attendance types together in a single voucher.
Attendance Voucher Entry – Manual Entry
Go to Gateway of Tally > Payroll Vouchers > F5: Attendance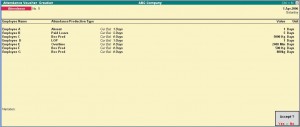
- Click F2: Date to change the date
- Select the Employee from the List of Employees
- Select the Attendance/Production Type from the List
- Enter the Value
- Select End of List from the List of Employees.
- Accept to save the voucher
ATTENDANCE VOUCHER ENTRY – AUTO FILL
In the attendance voucher, you can use the A : Payroll Auto Fill button to speed up data entry process.
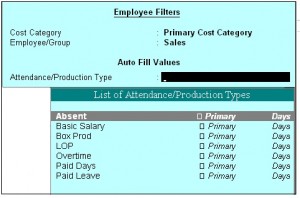
Auto Fill enables the user to fill all employees of a selected Cost Category (if more than one Cost Category is enabled) and/or a selected employee group and enter value data for selected type of Attendance/Production Type for these employees.
Go to Gateway of Tally > Payroll Vouchers> F5: Attendance
- Click F2: Date to enter the date.
- In the Attendance Auto Fill screen, select the Cost Category, if applicable.
- Select the Employee/Group from the List of Group/Employees.
- Select the Attendance/Production Type from the list.
- Accept to save the Attendance voucher.
Note: Days with Loss of Pay (LOP) are treated as a Deductible with respect to an Earning Pay Head type and as a Payable with respect to a deduction component. For Example: An LOP is deducted from Basic salary which is an Earning Pay Head. However, with respect to a Deduction Component such as canteen expenses, it is tr3eated as a payable.
PAYROLL VOUCHER
Payroll voucher is used to record Employees’ Payroll related transactions. This voucher may be used in two ways – Manual Entry and Automated Entry.
Payroll Voucher entry – Manual Salary
To Crate a Payroll voucher manually,
Go to Gateway of Tally > Payroll Vouchers > Payroll Voucher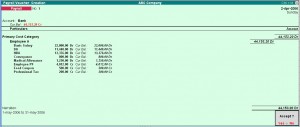
- Change the Voucher date.
- Select Salary Payroll from the List of Ledger Accounts.
- Select the Employee from the List of Employees in the field Particular
- Select the Pay Heads and Enter the appropriate values
- Select End of List and Accept the voucher.
Payroll Voucher – Auto Fill
To create a Payroll Voucher using the button A: Payroll Auto Fill,
Go to Gateway of Tally > Payroll Vouchers > Payroll voucher
- Select the Ledger Account (Cash/Bank/Salary Payable) From the list
Note: Yes can calculate the Payroll Voucher for a week or fortnight.
- Enter the From and To date in the Employee Filter Screen
- Select the Employee/Group from the List of Group/Employees
- Accept to save the voucher
Note: A single payroll voucher can be used to pass entries fro upto 100 employees efficiently. For a company with more than 100 employees, create a multiple payroll voucher for every 100 employees.
PAYROLL REPORTS
To view Payroll Reports
Go to Gateway of Tally > Display > Payroll Reports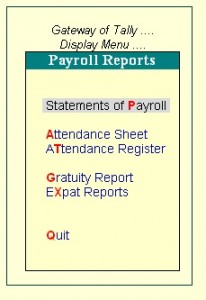
The Payroll Repots menu displays:
- Statement of Payroll
- Attendance Sheet
- Attendance Register
- Gratuity Report
- Export Report
STATEMENTS OF PAYROLL
Go to Gateway of Tally > Display > Payroll Report > Statements of Payroll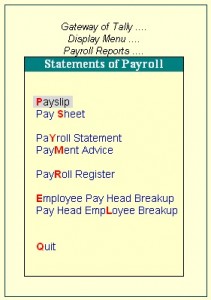
- Payslip
- Pay Sheet
- Payroll Statement
- Payroll Advice
- Payroll Register
- Employee Ledger Breakup
- Ledger Employee Breakup
PAYSLIP
A Payslip is a document issued to an employee that itemizes each component of earnings and deductions, and the net amount paid to an employee for a given pay period. It provides visibility to an employee of how the net amount has been arrived at.
In Tally Payroll, the Payslip option of Display, Payroll reports menu provides users the facility to View the Payslip, configure content and appearance bases on the requirement and then Print the Payslip.
Go to Gateway of Tally > Display > Payroll Reports > Statement of Reports > Payslip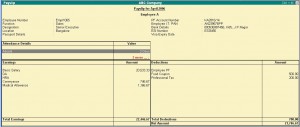
CONFIGURATION OPTIONS IN PAYSLIP
Click on F12: Configure button in the Payslip to display a configuration sub-form, using which the user can customize the display/printing content and appearance to the Payslip.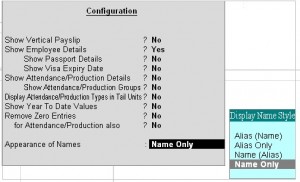
The default settings for the configuration options are shown above. These options are self-explanatory. The options, which are set to Yes, will become visible in he Payslip. Select No to exclude information, which is not required to be on the Payslip.
Configuration options in: Pay Slip
Show Vertical Payslip-Set this option to Yes to align Deduction Part below the Earning. Set it No to align them side-by-side.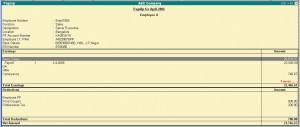
Show Employee Details – Set this option to Yes to display Employee Details as entered in the employee master.
Show Passport Details – Set this option to Yes to display the Passport Details.
Show Visa Expiry Date- Set this option to Yes to display the Visa Expiry Date.
Show Attendance/Production Details – Set this option to Yes to display Attendance/Production data.
Show Attendance/Production Groups – Set this option to Yes to display grouping of the Attendance/Production data as defined while Types creation.
Display Attendance/Production Type in Tail Units? – For compound units used in Attendance/Production Type, set this flag to Yes to display value of the Attendance/Production Data in Tail unit and set the same to No to display data in Main unit.
Show Year To Date Values – Set this option to Yes to display cumulative value of Attendance/Production data or Earning and Deduction data for the current Financial Year.
Remove Zero Entries – Set this option to Yes to remove Earning/Deduction data with Zero value from the Pay Slip
For Attendance/Production Also – Set this option to Yes to remove Attendance data with 0 values from the Pay Slip.
Appearance of Name- You can select the appropriate appearance of name from the Name Style list.
DETAILED/CONDENSED BUTTON
Click on Detailed button or press ALT+F1 to view source details of individual Attendance and Pay Head values. This view displays the Attendance or Payroll vouchers from which the data is picked in the current Payslip. Voucher Number, Date and the Value of the attendance or earning or deduction value is displayed. This is useful when multiple attendance/payroll vouchers are entered during the same payroll period. The user can drill down to the corresponding voucher directly from the Payslip screen.
Click the Condensed button or press ALT+F1 again to return to the normal mode.
Period Button
By default, when you bring up the Payslip view, the Period of Payslip – Attendance and Payroll Vouchers data is set to current month, and in most cases you don’t have to change it. However, if required, you can change the period of data and include multiple-period payroll information to view/print a consolidated Payslip. As in all other Tally reports, there is a great flexibility in terms of Period of Payroll processing as well as in the printing of Payslip.
EMPLOYEE BUTTON
Using Employee Button (F4 Key), you can view another employee’s Payslip from the existing Payslip display screen.
PRINTING SINGLE PAYSLIP
Click on Print button or Press ALT+P from the Payslip display screen to print currently displayed Payslip. Tally will print the Payslip in the format that is configured for display.
PAYSHEET
Pay Sheet is a matrix report with category, group and employees cascading in rows, and Pay Heads appears as columns. The default report contains all earnings and deduction details for a given month or period with a number of options t configure appearance of rows and columns. Format of the Pay sheet report may be configured to serve as a Salary/Wage register as required by the organization. The selection of data may be filtered for given category or group of employees.
Go to Gateway of Tally> Display> Payroll Reports> Statement of Reports> Pay Sheet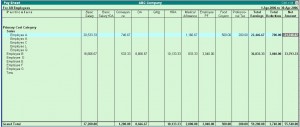
CONFIGURATION OPTIONS IN PAY SHEET REPORT
F12: Configure button in the Pay Sheet brings up a configuration sub-form by which the user can customize the display/printing content and appearance of the Pay Sheet report.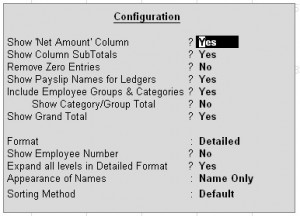
- Show ‘Net Pay’ Column – Set the option to Yes to display the Net Payable Column.
- Show Column Subtotals – Set this option to Yes to display the Sub-totals of Earnings/Deduction columns.
- Remove Zero Entries – Set this option to Yes to remove Earning/Deduction data with Zero value.
- Show Payslip Names for Ledgers – Set this option to Yes to display the Name to Appear in Payslip, defined in Ledger, as the column headings. Setting this to No will display Ledger name.
- Include Employee Groups & Categories – Set this option to Yes to display rows showing Category and Groups. Set this to No to list only employee information.
- Show Category/Group Total – Set this option to Yes to display Category and Group wise Totals.
- Show Grand Total – Set this option to Yes to display Grand total at the bottom of the report.
- Format – You can choose either Detailed or Condensed.
- . Show Employee Number – Set this option to Yes to display employee number along with the Name
- Expand all levels in Detailed format? – Set this option to Yes to expand all levels and display Employee details. Set the same to No, to display summary report for Category/Group
- Appearance of Name – You can select the appropriate appearance of name from the Name Style list.
- Sorting Method – You can select the appropriate sorting method from the list.
BUTTON FUNCTIONALITIES IN PAY SHEET REPORT
Detailed/Condensed Button
Use this toggle button (F1) to quickly change the report view from detailed to summary and vice versa.
Period button
Using Period (F2) button, you can change the period for which the report is viewed. Using this functionality, you can display the report any period such as Day, Week, Fortnight, Month, Quarter, Half-Year or entire Year.
Employee Filter Button
Similar to Payroll and Payment vouchers, using Employee Filter button or clicking on F7: Employee Filters button, the user can quickly select employee/groups to be displayed in the pay sheet report.
F4: Change Currency:
Click on F4: Change Currency button or press F4 key to change the currency.
New Column
Use this button (ALT+A), to add a column for any other Pay Head not part of the default Pay Slip format. Such new column is added on the right-hand side of the existing columns.
Alter Column
Use this button (ALT+A), to replace an existing column in the report with a new Pay Head column. The cursor should be positioned in the column to be replaced.
Delete Column
Use this button (ALT+D), to replace and existing column in the report with a new Pay Head column. The cursor should be positioned on the column to be deleted.
Use above column buttons to customize the appearance of various Pay Heads as columns as per requirement.
Printing Pay Sheet Report
Printing of Pay Sheet is done in a similar way as any other report in Tally, by Pressing ALT+P from the report display screen.
While printing the Pay Sheet report, choose an option to Increase the Line Height (for each employee line) for he purpose of obtaining signature of employee or fixing a stamp, and use the printed report for manual salary disbursement or any other similar purpose.
PAYROLL STATEMENT
While Pay Sheet report gives you a readily available set of earning/deduction columns and format, Payroll Statement Report allows you to generate the report for a specific Pay Head/Ledger.
Go to Gateway of Tally > Display > Payroll Reports > Statement of Reports > Payroll Statement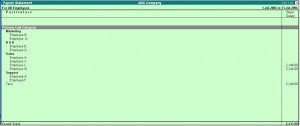
Note: The button Functionalities in Payroll Statement report is similar to Pay Sheet report.
Configuration options in Payroll Statement report
F12: Configure button in the Payroll Statement brings up a configuration Sub-form using which the user can customize the display/printing content and appearance of the Payroll statement report.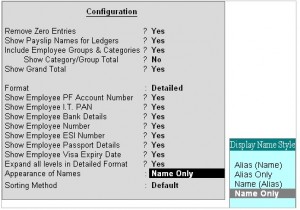
Remove Zero Entries: Set this option to Yes to remove Earning/Deduction data with Zero value.
Show Payslip Names for Ledgers – Set this option to Yes to pick the name entered in the Name to Appear in Payslip field in Ledger master screen. Set this option to No to pick the name entered in the Name field of the Ledger master screen.
Include Employee Groups & Categories – Set this option to Yes will display rows showing Category and Groups. Setting this to No will list only employee information.
Show Category/Group Total – Set this option to Yes to display Category and Group wise Totals.
Show Grand Total – Set this option to Yes to display Grand total at the bottom of the report.
Format – Detailed or Condensed
Show Employee PF Account Number – Set this option to Yes to display employee PF Account number.
Show Employee IT PAN– Set this option to Yes to display employee IT PAN number.
Show Employee Bank Details – Set this option to Yes to display employee bank details.
Show Employee Number – Set this option to Yes to display employee number along side the Name
Show Employee ESI Number– Set this option to Yes to display employee ESI number.
Show Employee Passport Details – Set this option to Yes to display employee passport details.
Show Employee Visa Expiry Date – Set this option to Yes to display employee Visa Expiry date.
Expand all levels in Detailed format – Set this option to Yes to expand all levels and display Employee details. Set the same to No, to display summary report for Category/Group.
Appearance of Name – You can Select the appropriate appearance of name from the Name Style list.
Sorting Method – You can select the appropriate sorting method from the list.
PAYMENT ADVICE
The Payment Advice repot is used to generate Payment Advice / Bank Transfer letters for a specific bank account based on the Salary Payment vouchers posted to the account
Go to Gateway of Tally> Display > Payroll Reports> Statement of Reports > Payment Advice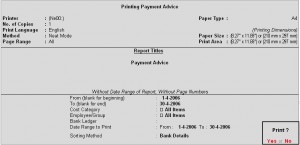
Click Yes to display the screen.
PAYROLL REGISTER
Payroll register is a month- wish transaction summary report displaying vouchers month-wise, akin to Display Statistics in the accounting module. Though the register primarily displays Payroll vouchers, you can customize to add any other voucher type by adding a new column.
Go to Gateway of Tally > Display > Payroll Reports > Statement of Report > Payroll Register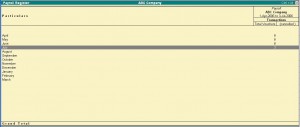
Press F12: Configure button and set the Appearance of Names and the Periodicity to use as shown
You can drill down to a List of Payroll Voucher reports for a month and then to a specific voucher, if required.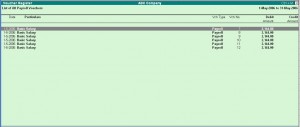
ATTENDANCE SHEET
The Attendance Sheet is similar to Pay Sheet report, and displays a pre-formatted report with columns, related to your attendance/production data.
Go to Gateway of Tally > Display > Payroll Reports > Attendance Sheet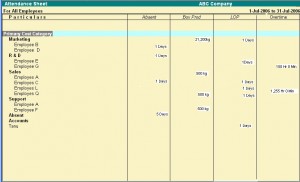
Configuration options in Attendance Sheet report
Configuration button, F12 in the Attendance Sheet, brings up a configuration sub-form by which the user can customize the display/printing content and appearance of the Attendance Sheet report.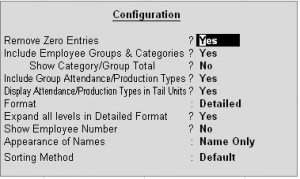
Include Group Attendance/Production Types- Set this option to Yes to Include Group Attendance/Production Types in Attendance Sheet report.
Display Attendance/Production Types in Tail Units? – Set this option to Yes to display the Attendance/Production Types in Tail Units.
ATTENDANCE REGISTER
This report is similar to Payroll register and displays the summary report of the Attendance vouchers. The configuration and button functionality are the same as in other Payroll Register reports.
Go to Gateway of Tally > Display > Payroll Reports> Attendance Register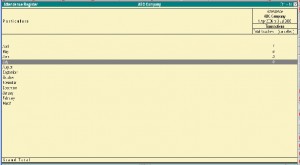
Press F12: Configure button and set the Appearance of Names and the Periodicity to use as shown:
Shortcut keys in Tally
The shortcut keys appear in button names in the button bar (right side of the Tally screen). You can either click the button from the button bar or pres the relevant function key or character underlined/double-underlined.
The buttons have a function key before the button names (Eg: F1: Select Cmp) which means you need to press F1 key (Function Key) to select the ‘Select Company’ screen
The buttons have an underlined character (Eg: F3: Cmp Info), which means you need to press ALT +F3 to select the ‘Company Info’ screen.
Some buttons have a double-underlined character (Eg: V: As Voucher) which means you need to press CTRL + V to select the ‘Voucher’ in voucher mode.
Function Key Combination
| Windows | Functionality | Availability |
| F1 | To select a company | At all masters menu screen |
| F1 | To select the Account Button | At the Accounting Voucher creation and alteration screen |
| F1 (ALT+F1) | To select the Inventory Button | At the Inventory/ Payroll Voucher creation and alteration screen |
| F1 (CTRL+F1) | To select Payroll Vouchers to alter | At the Accounting/ Inventory voucher creation or alteration screen. |
| F2 | To change the current date |
To select company inventory featuresAt almost all screens in TALLY
At the F11: Features screenF3To select the company
To select Company Statutory & Taxation featuresAt almost all screens in TALLY
At F11: Features screenF4To select the Contra voucherAt Accounting / Inventory Voucher creation and alteration screenF5To select the Payment voucherAt Accounting / Inventory Voucher creation and alteration screenF6To select the Receipt voucherAt Accounting / Inventory Voucher creation and alteration screenF7To select the Journal voucherAt Accounting / Inventory Voucher creation and alteration screenF8To select the Sales voucherAt Accounting / Inventory Voucher creation and alteration screenF8 (CTRL+F8)To select the Credit Note voucherAt Accounting / Inventory Voucher creation and alteration screenF9To select the Purchase voucherAt Accounting / Inventory Voucher creation and alteration screenF9 (CTRL+F9)To select the Debit Note voucherAt Accounting / Inventory Voucher creation and alteration screen


